
How to Configure and Use the Android APK Builder in Hyper PWA
The Android APK Builder is a premium feature of Hyper PWA. To use this feature, you must upgrade your plugin to the Premium plan.👉 Upgrade to Premium Plan
The Android APK Builder lets you package your Progressive Web App (PWA) into an official Android App Bundle (.aab) and installation file (.apk) so you can distribute and publish your website directly on the Google Play Store.
⚙️ Step 1: Configure the Android Settings in WordPress
Log in to your WordPress Dashboard, go to Hyper PWA > Premium Features, and expand the Android APK Builder accordion.
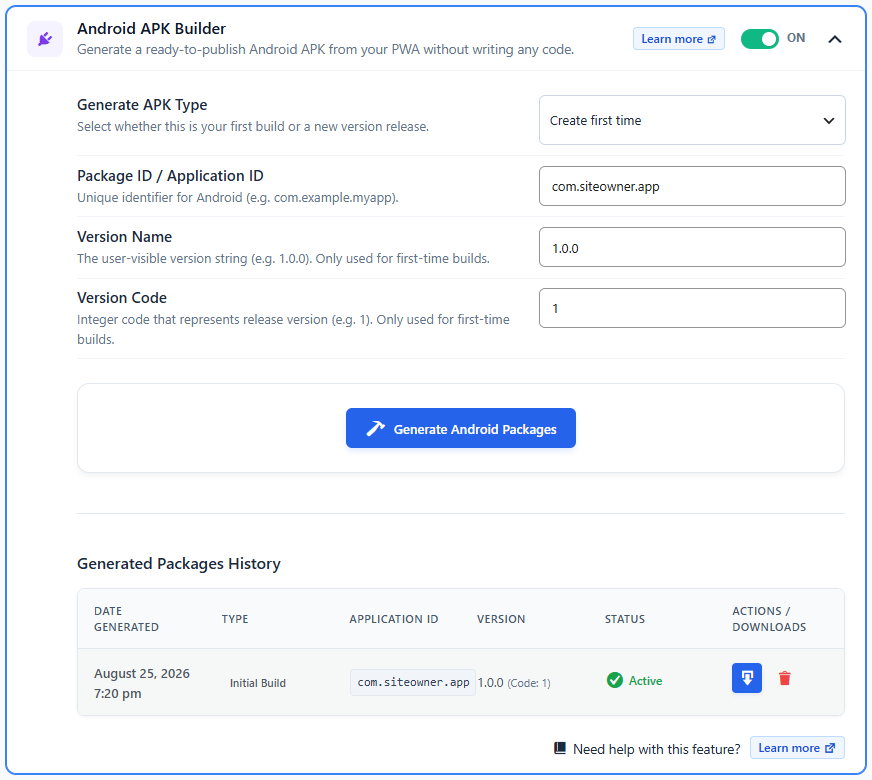
Fill in the following fields:
- Generate APK Type: Select Create first time (if this is your first release) or Create new version of APK (if you are releasing an update).
- Package ID: This is a unique identifier for your app on Android (e.g.,
com.mywebsite.app). It must only contain lowercase letters, numbers, and dots. - Version Name & Code:
- For first-time builds, set the Version Name to
1.0.0and Version Code to1. - For subsequent updates, increase these numbers (e.g., version
1.1.0and code2).
- For first-time builds, set the Version Name to
- Key File (Keystore): Select or upload your private signing key file (
.jksor.keystore).- If you do not have one, the builder will automatically generate a secure key file for you.
- Passwords: Enter a password for your Key File and Key Store to cryptographically secure your package.
- Trigger Build: Click the blue build button to launch the cloud compiler.
Once the build is complete (usually taking 1 to 2 minutes), you can download the Deployment ZIP Archive directly to your computer.
📦 What Is Inside the Deployment ZIP?
Your downloaded ZIP archive contains:
- 🚀
your-app-id.aab: The Android App Bundle file. This is the exact file you upload to the Google Play Console for store distribution. - 📦
your-app-id.apk: The test installation file you can copy to your phone to test the app locally. - 🔗
assetlinks.json: The Digital Asset Links configuration file. This is required to link your domain to your app. - 🔑
signing.keystore&signing-key-info.txt: Your private security key files and credentials.
CAUTION
Keep Your Keystore File Safe!
Save a backup copy of the signing.keystore file in a secure location (like Google Drive or a USB drive). If you lose this key, you will be permanently locked out from updating your app on the Google Play Store in the future.
🔗 Step 2: Upload Digital Asset Links (Remove Browser Header)
To make your app look like a true native application, you must remove the browser’s address bar.
- Locate the
assetlinks.jsonfile inside your downloaded ZIP folder. - Upload this file to your website’s server.
- It must be publicly accessible at exactly this URL path:
https://yourdomain.com/.well-known/assetlinks.json
🚀 Step 3: Publish to Google Play Store
Once you have verified your test app and uploaded the asset link validation file, follow these steps to release it to the public:
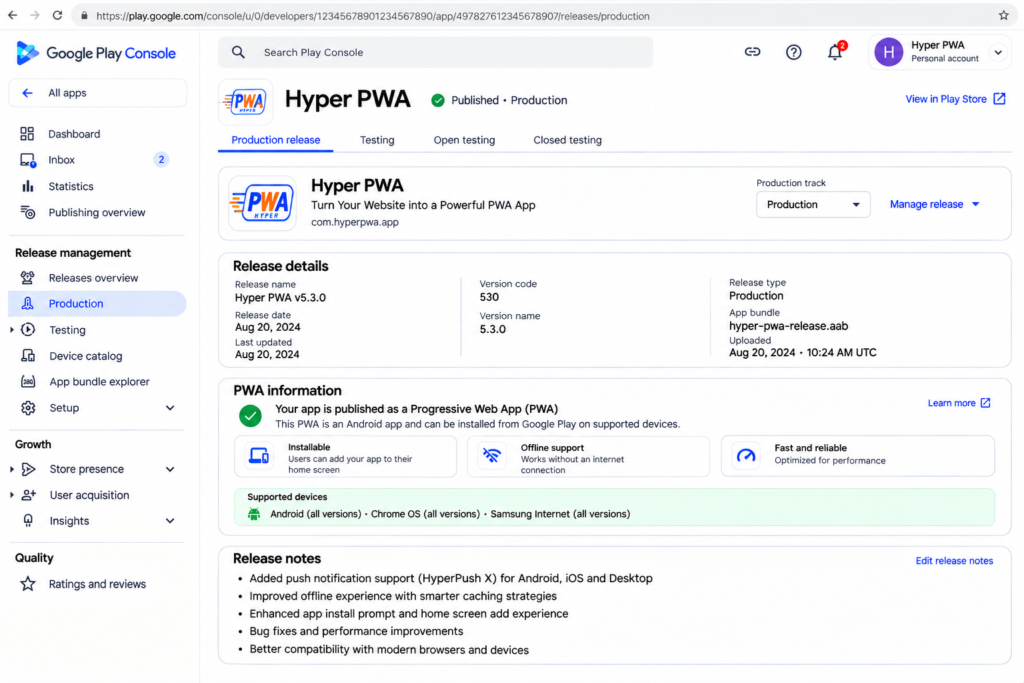
1. Create a Developer Account
- Go to the Google Play Console.
- Log in and register as a developer (requires a one-time registration fee of $25 paid to Google).
2. Create Your Application
- Click Create App in the top-right corner.
- Enter your App Name, select Default Language, set App Category (App vs. Game), and select Free (you can change pricing details later).
3. Complete Play Console Setup Checklists
Before you can release the app, Google requires you to complete their setup dashboard:
- Provide a Privacy Policy URL hosted on your site.
- Fill out the Content Rating questionnaire.
- Complete the Data Safety form (disclose if your website collects cookies/user logins).
4. Set Up Store Listing
Fill out your app’s public store page:
- Short Description & Full Description: Explain what your website/app does.
- App Icon: Upload a square PNG, 512×512 pixels.
- Feature Graphic: Upload a landscape banner, 1024×500 pixels.
- Screenshots: Upload at least 2 to 4 screenshots of your app running on a mobile screen.
5. Create a Production Release
- Go to Release > Production in the sidebar.
- Click Create new release.
- Drag and drop the
.aabfile (Android App Bundle) from your downloaded ZIP folder into the upload box. - Enter release notes (e.g. “Initial release of our mobile application.”).
- Click Save and then click Review release.
- Select Start rollout to Production to submit your app for Google review.
Note: Google’s review process generally takes between 3 to 7 days for new accounts before the app goes live on the store.