How To Fix Missing Icons And Screenshots In Hyper PWA
For a Progressive Web App (PWA) to pass browser validation and trigger installation dialogs, it must reference high-quality, accurately dimensioned application icons and screen screenshots inside its Web App Manifest.
If your icons are not showing on mobile home screens, or if your screenshots are missing inside browser install prompt dialogs, follow this troubleshooting guide to fix the issues.
📐 spec-1: Correct Icon Formats and Dimensions
Web browsers (especially Google Chrome, Microsoft Edge, and Apple Safari) enforce strict requirements on image sizes. If an icon does not match the exact expected size or aspect ratio, the browser will ignore it.
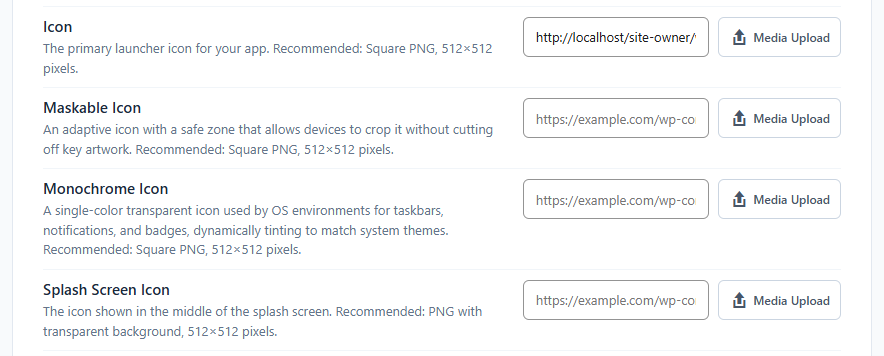
App Icon Requirements:
- App Icon (Required):
- Dimensions: Must be exactly 512×512 pixels (Square aspect ratio
1:1). - Format: Must be PNG format (Transparency is supported). Avoid uploading
.jpg,.svg, or.webpfiles as some older mobile operating systems fail to parse them for home screen shortcuts.
- Dimensions: Must be exactly 512×512 pixels (Square aspect ratio
- Maskable Icon:
- Used by Android to wrap your logo inside various shapes (circles, squares, squircles). Keep your logo’s central graphic inside the inner safe area (a circular boundary covering the center 60% of the canvas) to prevent it from being cropped.
- Apple Touch Icon:
- Dimensions: Must be exactly 180×180 pixels (Square). Used specifically by iOS Safari when adding a shortcut bookmark.
📱 spec-2: Configure PWA App Screenshots
To display rich screenshots inside Google Chrome’s desktop and mobile app install dialog prompts, you must upload screenshots showing your app’s actual interface.
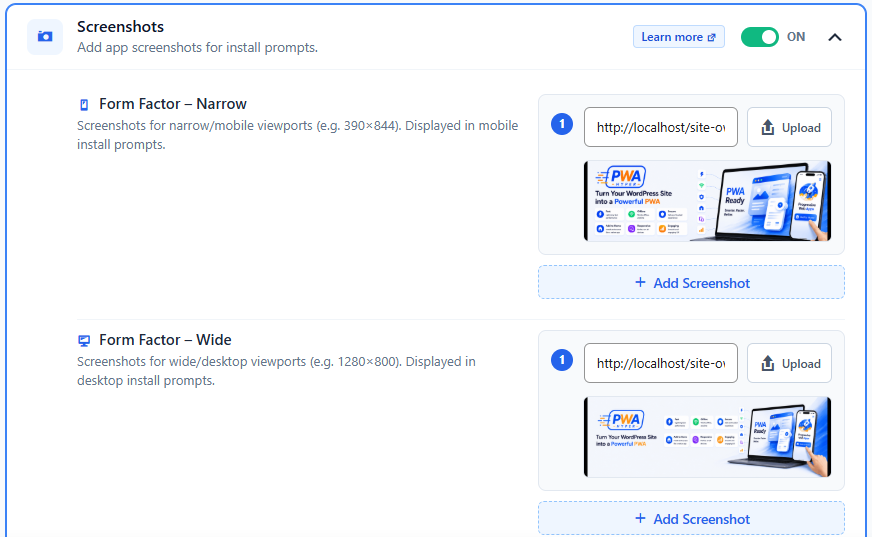
Screenshot Guidelines:
- Mobile / Narrow Screenshots:
- Used for mobile install dialogs. Upload images with portrait aspect ratios (e.g., 1080×1920 pixels or similar).
- Desktop / Wide Screenshots:
- Used for desktop install prompts. Upload images with landscape aspect ratios (e.g., 1920×1080 pixels).
- Format: Must be PNG or JPG files.
- Requirements: You must add at least 1 mobile screenshot and 1 desktop screenshot to trigger Chrome’s rich install modal interface.
🔒 Check-1: Insecure Image URLs (Mixed Content Warnings)
If your website is loaded over HTTPS, but your PWA icons or screenshots are loaded using an insecure HTTP link (e.g., http://yourdomain.com/wp-content/uploads/icon.png), browsers will block them due to security protocols.
How to Fix:
- Open your browser console (F12) and check for Mixed Content errors.
- Go to Hyper PWA > Advanced and ensure Fix Mixed Content is enabled.
- Verify that the URLs of your uploaded assets in the settings field start with
https://.
⚡ Check-2: Caching and CDNs
If you updated your icons or screenshots, but the old ones (or broken placeholders) are still showing:
- Clear WordPress Cache: Purge all cache inside plugins like WP Rocket, LiteSpeed Cache, or Autoptimize.
- Clear CDN Cache: If you are using Cloudflare, log in and purge the cache for the manifest endpoint:
https://yourdomain.com/wp-json/hypwa/v1/manifest. - Reset Browser Application State:
- Open Chrome DevTools (F12).
- Go to Application > Storage.
- Click Clear site data to force the browser to drop the cached PWA assets.
📁 Check-3: Restrictive File Permissions
Sometimes, security plugins change permissions on your wp-content/uploads/ directory, preventing public access to your icons.
- Verify that your icons are publicly viewable by copying their URL and opening it in an incognito window.
- If you see a
403 Forbiddenerror, update the file permissions of the image files on your web host to 644 (read and write for owner, read-only for others).