
How to Integrate HyperPush X with Hyper PWA
📋 Integration Prerequisites
Before starting, ensure that:
- Your WordPress website is served over a secure HTTPS origin.
- The Hyper PWA plugin is installed and activated.
- You have an active account on hyperpushx.com.
🛠️ Step-by-Step Walkthrough
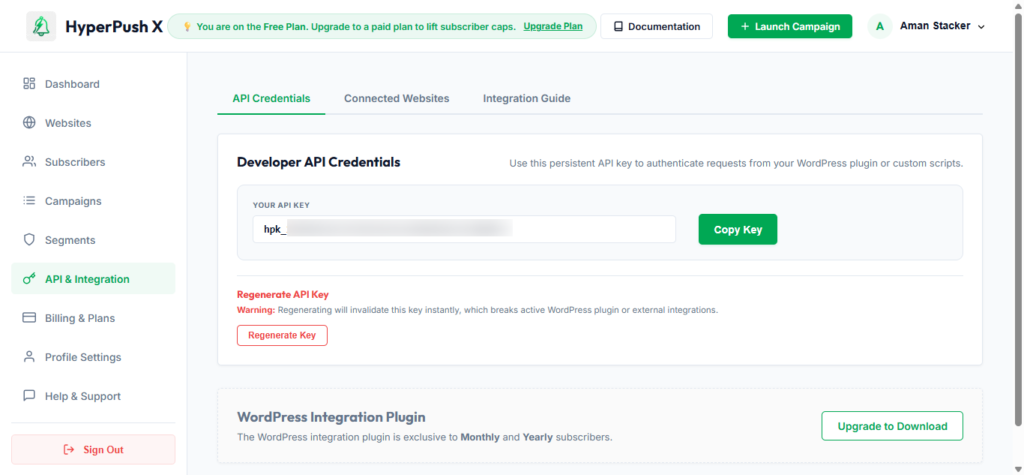
Step 1: Retrieve Your API Key from HyperPush X
- Log in to your account at hyperpushx.com/login.
- From the sidebar menu, navigate to API & Integration.
- Under the API Credentials tab, copy your existing token (format:
hp_live_...).
Step 2: Input API Key in WordPress Dashboard
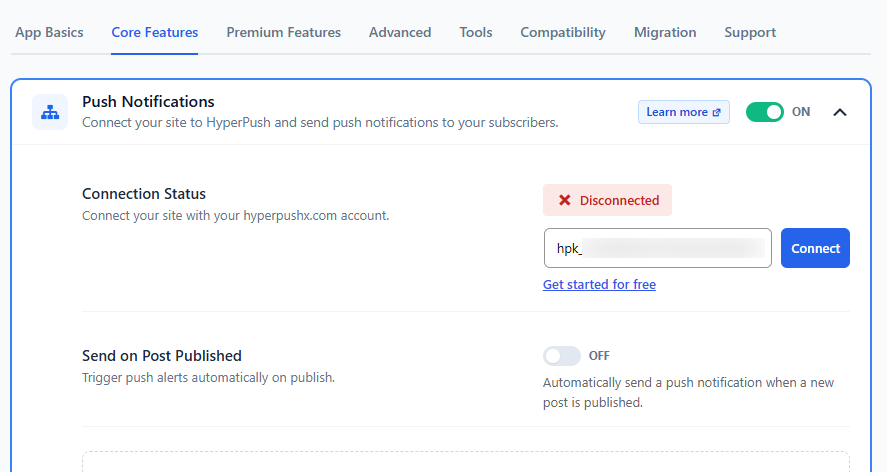
- Log in to your WordPress dashboard.
- Go to Hyper PWA in the sidebar.
- Open the Core Features tab.
- Click to expand the Push Notifications accordion.
- Turn on the accordion toggle.
- Paste your copied API Key into the text input field.
- Click the Connect button.
Step 3: Verify the Connection and Subscriber Stats
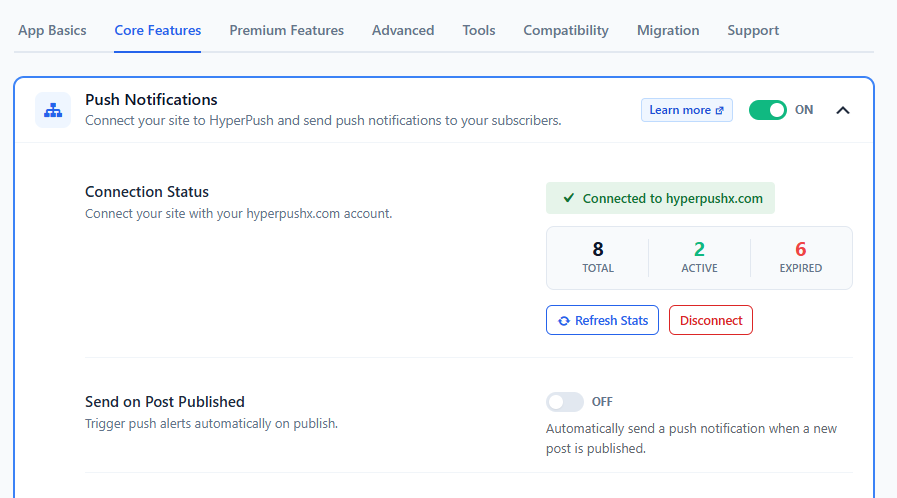
Once connected successfully, the page will reload and show:
- A green badge: “Connected to hyperpushx.com”
- A statistics panel displaying:
- Total: Total subscriber count registered from your domain.
- Active: Subscriptions that are currently active and reachable.
- Expired: Dead subscriptions (revoked permissions or cleared browser data).
- A Refresh Stats button to sync data on demand.
Step 4: How to Test the Frontend Subscription Flow (Testing Yourself)
To test if visitors can successfully subscribe, simulate a new user visiting your site:
- Access your site: Visit your website URL.
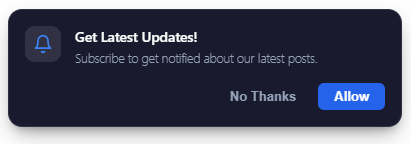
- Verify the Opt-in Dialog: Once the page loads, the browser will display the native permission request:
- “example.com wants to: Show notifications”
- Click “Allow”: Click Allow to register your browser.
- Verify in Admin Settings: Go back to your WordPress admin settings under Hyper PWA > Core Features > Push Notifications, click Refresh Stats, and confirm that the Active subscriber count increases.
📢 Sending Notifications
Once you are connected and have at least one active subscriber, you can send push campaigns:
1. Send Manual Notifications (Dual-Control)
You can create and send custom manual notifications from either of the following locations:
- Option A: Hyper PWA Dashboard: Open the Send Manual Notification form directly inside the Push Notifications accordion. Fill out the Title, Message, redirect link, and optional image URL, then click Send.
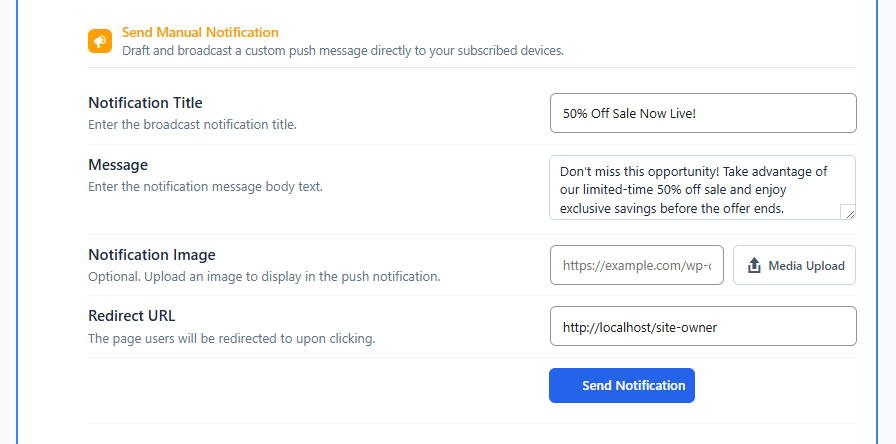
- Option B: HyperPush X Console: Log in to hyperpushx.com to draft, filter, target, and dispatch campaigns using their advanced web dashboard interface.
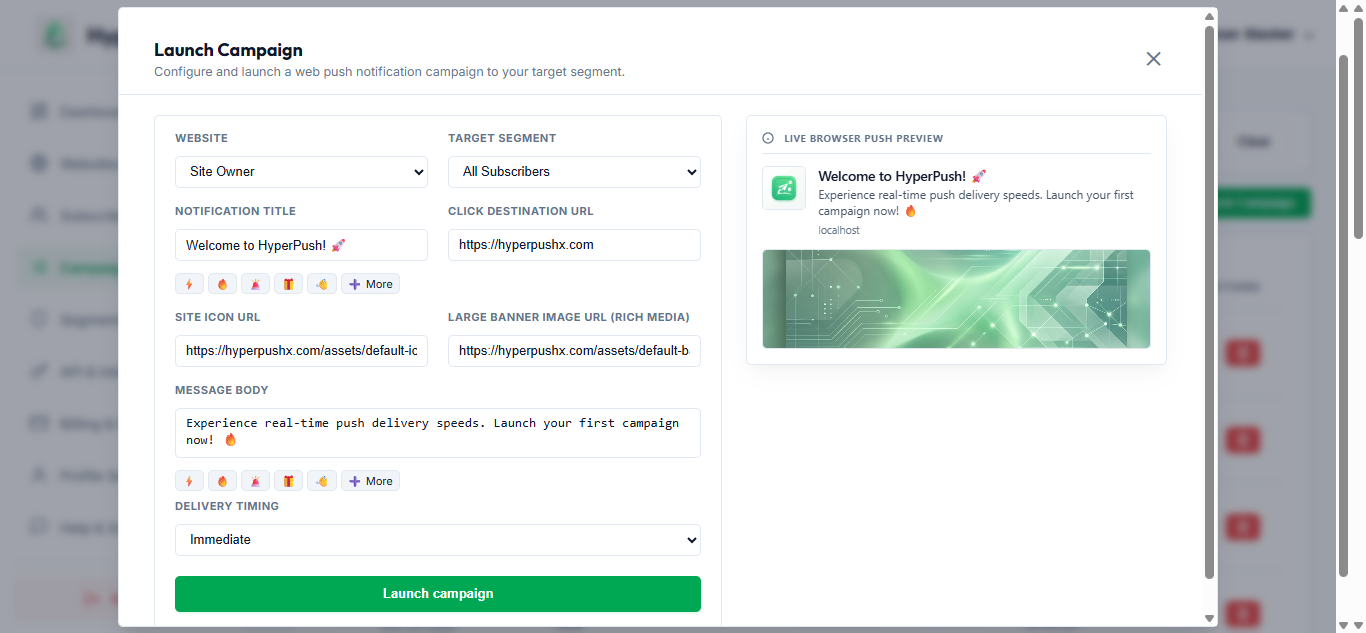
2. Automatic Notification on Post Publication
Enable the Send on Post Published toggle to instantly trigger a push notification to all subscribers whenever you publish a new blog post.
⚠️ Troubleshooting & Warnings
Dedicated HyperPush-X Plugin Conflict
If you are on the Monthly or Yearly plan and install the dedicated HyperPush-X plugin, it will automatically override and disable the native push settings in Hyper PWA. This is intended to prevent duplicate JavaScript files from running on the frontend.